
rk61 manual
RK61 Manual: A Comprehensive Guide
This guide details the ROYAL KLUDGE RK61‚ covering wired use‚ Bluetooth pairing‚ backlight features‚ multimedia controls‚ and troubleshooting steps for optimal performance.
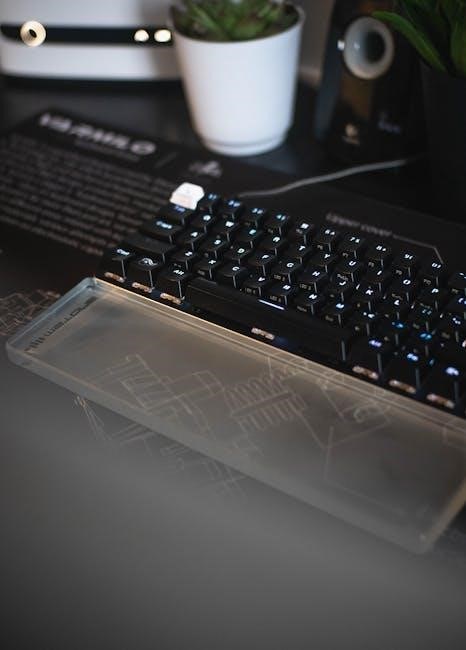
The RK61 is a compact‚ 61-key mechanical keyboard designed for gamers and typists seeking portability without sacrificing functionality. It boasts a robust build quality and customizable features‚ making it a popular choice among mechanical keyboard enthusiasts. This manual serves as a comprehensive resource for understanding and utilizing all aspects of your RK61.
Whether you’re connecting via USB or utilizing its Bluetooth capabilities‚ this guide will walk you through the setup process. Learn to master the RGB backlight‚ multimedia controls‚ and potential advanced customization options. We’ll also address common issues and provide troubleshooting steps to ensure a seamless user experience. Prepare to unlock the full potential of your RK61!
What’s in the Box?
Upon opening your RK61 package‚ you should find the following items: the RK61 mechanical keyboard itself‚ a USB-C cable for wired connectivity and charging‚ and a set of keycap pullers – essential for customization and maintenance. While a full printed manual may be absent (as some users have reported losing it)‚ access to a digital version is readily available online.
Carefully inspect the contents to ensure all components are present and undamaged. The USB-C cable is crucial for both powering the keyboard and establishing a wired connection to your computer. The keycap pullers allow for easy removal and replacement of keycaps‚ enabling personalization and cleaning. Retain the packaging for potential warranty claims or returns.
Keyboard Layout and Keycaps
The RK61 features a 61-key compact layout‚ designed to maximize desk space without sacrificing functionality. This condensed design utilizes key combinations‚ often accessed via the Fn key‚ to replicate the functions of a full-sized keyboard. The keycaps are typically made of ABS plastic‚ though variations exist.
Understanding the layout is crucial for efficient use. Familiarize yourself with the location of essential keys and the Fn key combinations for accessing multimedia controls and other features. The included keycap puller facilitates easy removal and replacement‚ allowing for customization with aftermarket keycaps. Explore online resources for keymap diagrams to quickly learn the layout.

Getting Started: Wired Mode
Connect the RK61 via the included USB cable for a reliable connection‚ enabling immediate functionality without needing Bluetooth pairing or driver installation.
Connecting via USB
Establishing a wired connection with your RK61 is straightforward. Locate the USB-C port on the keyboard – typically found on the rear edge. Insert the provided USB cable firmly into this port and then connect the other end to a free USB port on your computer.
The RK61 should be instantly recognized by your operating system‚ requiring no additional driver installations. Once connected‚ the keyboard is ready for immediate use. If it doesn’t connect‚ try a different USB port. A common issue reported involves toggling the power switch on the keyboard’s back to the ‘off’ position before plugging it in‚ then back ‘on’.
This ensures a clean connection and resolves potential detection problems.
Troubleshooting USB Connection Issues
If your RK61 isn’t recognized via USB‚ several steps can resolve the issue. First‚ ensure the USB cable is securely connected at both ends – keyboard and computer. Try a different USB port on your computer; some ports may provide insufficient power.
A frequently reported fix involves the power switch located on the keyboard’s rear. Turn the switch to the ‘off’ position‚ disconnect the USB cable‚ then switch it back ‘on’ and reconnect. If problems persist‚ test the cable with another device to confirm its functionality.
Occasionally‚ a complete battery depletion‚ followed by a recharge while connected via USB‚ can reset the connection.
Initial Functionality Check
After connecting your RK61 via USB‚ verify basic functionality. Open a text editor (like Notepad or TextEdit) and test each key to ensure it registers correctly. Pay attention to both alphanumeric keys and function keys. Confirm that the backlight illuminates as expected when the keyboard is powered on.
If using Bluetooth‚ once paired‚ perform the same key test within your chosen application. Check volume controls (using Fn key combinations) and media playback buttons. A thorough initial check identifies any immediate hardware issues or incorrect key mappings before further customization.
This quick test confirms the keyboard is communicating properly with your device.
Bluetooth Pairing and Connection
Establishing a wireless link involves switching to Bluetooth mode and utilizing the Fn + W key combination for seamless device pairing and connectivity.
Switching to Bluetooth Mode
To initiate Bluetooth functionality on your RK61‚ a crucial first step is often required: physically turning off the keyboard using the switch located on the back. Many users have reported that simply attempting pairing without this initial step proves unsuccessful. After ensuring the switch is in the ‘off’ position‚ reconnect the keyboard via USB.
This process seems to reset the keyboard’s connection state‚ allowing it to be properly recognized by devices when attempting Bluetooth pairing. Leaving the keyboard ‘on’ and repeatedly unplugging it until the battery depletes is another reported‚ albeit less ideal‚ workaround. Once the switch is flipped to ‘on’ after the USB connection‚ the RK61 is ready to enter pairing mode.

Pairing with Devices (Fn + W)
Successfully entering Bluetooth pairing mode on the RK61 often requires a specific key combination: Fn + W. After switching the keyboard to Bluetooth mode (and potentially resetting it as described previously)‚ pressing and holding these two keys simultaneously will initiate the pairing process. The keyboard will then become discoverable by nearby Bluetooth-enabled devices‚ such as tablets‚ smartphones‚ or computers.
Users who have struggled with initial detection have found this Fn + W combination to be the key to success. It’s important to note that some devices may not automatically detect the RK61; actively scanning for Bluetooth devices on your target device is recommended. This simple keypress unlocks the wireless capabilities of your RK61.
Troubleshooting Bluetooth Pairing
If your RK61 fails to pair‚ first ensure Bluetooth is enabled on your device and that it’s actively searching. A common fix involves toggling the power switch on the back of the keyboard to the “off” position‚ then back “on‚” before attempting pairing again with Fn + W. Some users report needing to fully deplete the battery before a successful connection is established – a complete discharge and recharge can reset the Bluetooth functionality.
If pairing still fails‚ try forgetting any previously paired devices on both the keyboard and your target device. Interference from other wireless signals can also hinder pairing; move away from potential sources. Remember to scan for devices on your target device!
Bluetooth Connection Stability
Maintaining a stable Bluetooth connection with your RK61 requires considering several factors. Distance between the keyboard and the paired device is crucial; keep them within a reasonable range (ideally under 10 feet) for optimal performance. Wireless interference from other Bluetooth devices‚ Wi-Fi routers‚ or even microwaves can disrupt the signal. Try minimizing these potential sources of interference.
Ensure your device’s operating system is up-to-date‚ as updates often include Bluetooth driver improvements. Periodically “forgetting” and re-pairing the RK61 can also refresh the connection. If frequent disconnections persist‚ a full battery charge might resolve the issue‚ as low power can sometimes affect Bluetooth stability.
Backlight Control
The RK61 features customizable RGB backlighting‚ offering various modes‚ brightness adjustments‚ and speed controls to personalize your typing experience with vibrant effects.
RGB Backlight Modes
The RK61 boasts a diverse selection of RGB backlight modes designed to enhance your typing experience and aesthetic preferences. Users can cycle through pre-programmed effects like static color‚ breathing‚ wave‚ and reactive modes‚ responding to key presses with dynamic illumination. Further customization is often available‚ allowing for color adjustments within each mode. Exploring these options provides a personalized visual experience. Some modes prioritize subtle ambiance‚ while others deliver vibrant‚ energetic displays. Experimenting with the different settings unlocks the full potential of the RK61’s lighting system‚ creating a visually appealing and immersive setup. The variety ensures a mode to suit any mood or gaming scenario.
Adjusting Brightness
Controlling the backlight brightness on your RK61 is straightforward‚ allowing you to adapt to various lighting conditions. Typically‚ brightness is adjusted using a dedicated function key combination – often Fn + Up Arrow to increase and Fn + Down Arrow to decrease. Multiple brightness levels are usually available‚ ranging from completely off to maximum intensity. This flexibility ensures comfortable viewing in both dimly lit rooms and brightly lit environments. Fine-tuning the brightness not only enhances visibility but also helps conserve battery power when using the keyboard wirelessly. Remember to experiment with different levels to find your preferred setting for optimal clarity and energy efficiency.
Changing Backlight Speed
Customizing the speed of the RGB backlight effects on your RK61 adds a dynamic element to your typing experience. Usually‚ dedicated function key combinations control this feature. Look for Fn + Page Up to increase the speed and Fn + Page Down to decrease it. These adjustments alter how quickly the colors cycle through the selected mode. Faster speeds create a more energetic and vibrant display‚ while slower speeds offer a subtler‚ more relaxed visual effect. Experimenting with different speeds allows you to personalize the backlight to match your mood or the atmosphere. Remember to consult your specific model’s documentation for precise key combinations.
Customizing Backlight Effects
The RK61 offers a variety of pre-programmed RGB backlight effects to personalize your keyboard. Typically‚ you cycle through these modes using a function key combination‚ often Fn + Scroll Lock. Available effects may include static color‚ breathing‚ wave‚ reactive‚ and rainbow modes. Some keyboards allow for further customization through dedicated software (if available). Explore the different options to find a style that suits your preferences. Remember that the specific key combinations and available effects can vary slightly depending on the RK61 model. Refer to the full manual for a complete list and detailed instructions on accessing each effect.

Multimedia Controls
Utilize Fn key combinations to manage media playback – control volume‚ play/pause‚ and skip tracks directly from your RK61 keyboard for convenience.
Using Fn Key Combinations for Media
The RK61 offers convenient multimedia control through dedicated Fn key combinations. To adjust the volume‚ press Fn + Up Arrow to increase and Fn + Down Arrow to decrease. For playback control‚ Fn + Spacebar will typically toggle between play and pause.
To skip to the next track in your playlist‚ use the combination Fn + Right Arrow‚ while Fn + Left Arrow will return you to the previous track. These shortcuts allow for seamless control of your audio and video experiences without needing to reach for your mouse or other controls. Experiment with these combinations to find what works best for your preferred media player.
Volume Control
Effortlessly manage your audio levels directly from the RK61 keyboard. Utilizing the Fn key in conjunction with the arrow keys provides precise volume adjustments. To increase the system volume‚ simply press and hold the Fn key while pressing the Up Arrow key. Conversely‚ to decrease the volume‚ hold Fn and press the Down Arrow key.
These intuitive shortcuts eliminate the need to navigate through software controls‚ offering quick and convenient access to volume adjustments. The responsiveness of these controls ensures smooth and accurate volume adjustments‚ enhancing your overall listening experience. Experiment with short and long presses for finer control.
Play/Pause and Skip Tracks
Take complete control of your media playback with dedicated RK61 key combinations. Pressing Fn + Spacebar will instantly play or pause your currently playing audio or video. Need to jump to the next track? Utilize Fn + Right Arrow. Want to revisit the previous track? Simply press Fn + Left Arrow.
These convenient shortcuts allow for seamless navigation through your playlists and media content without interrupting your workflow. The responsiveness of these functions ensures a smooth and enjoyable media experience. These controls work across various media players and streaming services‚ providing universal compatibility and ease of use.

Advanced Features & Customization
Explore deeper control with potential macro programming and key remapping options‚ alongside available software support for personalized RK61 functionality.
Macro Programming (if applicable)
The RK61 may offer macro programming capabilities‚ allowing users to record and assign complex key sequences to a single key press. This feature significantly enhances efficiency for repetitive tasks in gaming or productivity applications. While specific software or onboard methods vary‚ the process generally involves entering a macro recording mode‚ performing the desired key sequence‚ and then saving it to a designated key.
Check the official Royal Kludge documentation or included software to confirm macro support and learn the exact steps for programming. Successful macro implementation can dramatically streamline workflows and provide a competitive edge in certain scenarios. Remember to test your macros thoroughly to ensure they function as intended.
Key Remapping (if applicable)
The RK61 might support key remapping‚ enabling users to customize the keyboard layout to suit their preferences. This allows assigning different functions to individual keys‚ improving ergonomics and workflow efficiency. Remapping is often achieved through dedicated software provided by Royal Kludge‚ or potentially through onboard key combinations‚ depending on the model.
Explore the available software options to unlock the full potential of key remapping. Consider remapping frequently used keys for easier access or creating a layout optimized for specific applications. Thoroughly test any changes to ensure functionality and avoid unintended consequences. A customized layout can significantly enhance your typing experience.
Software Support (if any)
Royal Kludge may offer dedicated software for the RK61‚ enhancing customization options beyond onboard controls. This software typically allows for advanced key remapping‚ macro programming‚ and detailed RGB backlight adjustments. Check the official Royal Kludge website or included documentation to determine software availability and download instructions.
Software support can significantly expand the keyboard’s functionality‚ providing a user-friendly interface for complex configurations. Regularly check for software updates to benefit from bug fixes and new features. If software isn’t available‚ explore community-developed alternatives‚ but exercise caution when installing third-party applications.

Power Management & Charging
The RK61 features a rechargeable battery; charging is done via USB. Monitor battery life and utilize the low battery indicator to prevent interruptions during use.
Charging the RK61
To charge your RK61‚ connect it to a powered USB port on your computer or a USB wall adapter using a compatible USB cable. A charging indicator light will illuminate‚ typically red‚ to signify that the charging process has begun. Allow several hours for a full charge‚ though the exact time will depend on the current battery level and the power output of the USB port.
It’s generally recommended to use a 5V/1A adapter for optimal charging. Avoid using high-voltage chargers‚ as they could potentially damage the battery. While charging‚ you can continue to use the keyboard in wired mode. Once fully charged‚ the indicator light will usually change to green‚ or turn off completely. Disconnect the keyboard once charging is complete to conserve energy and prolong battery lifespan.
Battery Life Expectancy
The RK61’s battery life varies based on usage patterns‚ particularly backlight brightness and Bluetooth connectivity. With moderate use – including some backlight and occasional Bluetooth pairing – you can generally expect around 5-7 hours of continuous operation on a full charge.
If you disable the backlight entirely and primarily use a wired connection‚ battery life can extend significantly‚ potentially reaching up to 10-15 hours. Heavy usage with maximum brightness and constant Bluetooth use will naturally reduce battery life. Regularly charging the keyboard when it reaches a low battery level will help maintain optimal performance and prolong the overall lifespan of the battery itself.
Low Battery Indicator
The RK61 features a visual low battery indicator to alert you when power is running low. This typically manifests as a flashing red backlight‚ or a specific pattern of blinking keys. The exact indicator may vary slightly depending on the firmware version.
When the low battery indicator activates‚ it’s crucial to connect the keyboard to a power source using the provided USB cable. Continuing to use the keyboard with a critically low battery can lead to unexpected shutdowns or connectivity issues. Promptly charging the device ensures uninterrupted operation and prevents potential data loss during wireless use. Pay attention to the indicator to avoid inconvenience!
Turning the Keyboard Off
Properly turning off your RK61 is essential for conserving battery life and preventing accidental key presses. Locate the power switch on the back of the keyboard – it’s clearly marked “ON” and “OFF”. Slide the switch firmly to the “OFF” position;
Important Note: Some users have reported needing to fully deplete the battery before the keyboard will reliably recognize being switched off. If experiencing pairing issues‚ try letting the battery die completely‚ then turning it off after it’s dead. Ensure the switch is fully engaged to avoid phantom power drain. This simple step maximizes battery longevity and ensures reliable performance.

Troubleshooting Common Issues
Resolve typical RK61 problems like unresponsive keys‚ Bluetooth disconnects‚ backlight malfunctions‚ and keycap concerns with our dedicated troubleshooting guidance for smooth operation.

Keyboard Not Responding
If your RK61 isn’t responding‚ first ensure the USB cable is securely connected at both ends‚ or verify Bluetooth is enabled and paired correctly. A common fix‚ reported by Reddit users‚ involves toggling the power switch on the keyboard’s back to the ‘off’ position‚ then plugging it in. Repeated attempts to connect while powered on may fail; letting the battery fully drain before reconnecting can resolve this.
Also‚ confirm the keyboard is recognized by your operating system. Try a different USB port or Bluetooth device. If issues persist‚ a reset might be necessary – consult the full manual for specific reset procedures. Remember to check for driver updates if using a wired connection.
Bluetooth Disconnecting Frequently
Experiencing frequent Bluetooth disconnects with your RK61? Several factors could be at play. Ensure the keyboard is within a reasonable range of your paired device and that there are no significant obstructions. Interference from other wireless devices can also cause instability. Reddit users suggest a full battery charge often improves connection reliability.
Try unpairing and re-pairing the keyboard (using Fn + W). If the problem continues‚ test with a different Bluetooth-enabled device to isolate whether the issue lies with the keyboard or the original paired device. Check for firmware updates for both the keyboard and your host device.
Backlight Malfunctions
If your RK61’s backlight isn’t functioning as expected‚ begin by verifying the brightness level isn’t set too low. Cycle through the brightness settings using the appropriate Fn key combination. If the backlight is completely unresponsive‚ try a different RGB mode to rule out a mode-specific issue. A reset of the keyboard might resolve software glitches affecting the backlight.
Ensure the keyboard is adequately charged‚ as low battery levels can sometimes impact backlight performance. Inspect the keycaps for any physical obstructions blocking the LEDs. If problems persist‚ consult online resources or contact Royal Kludge support for further assistance.
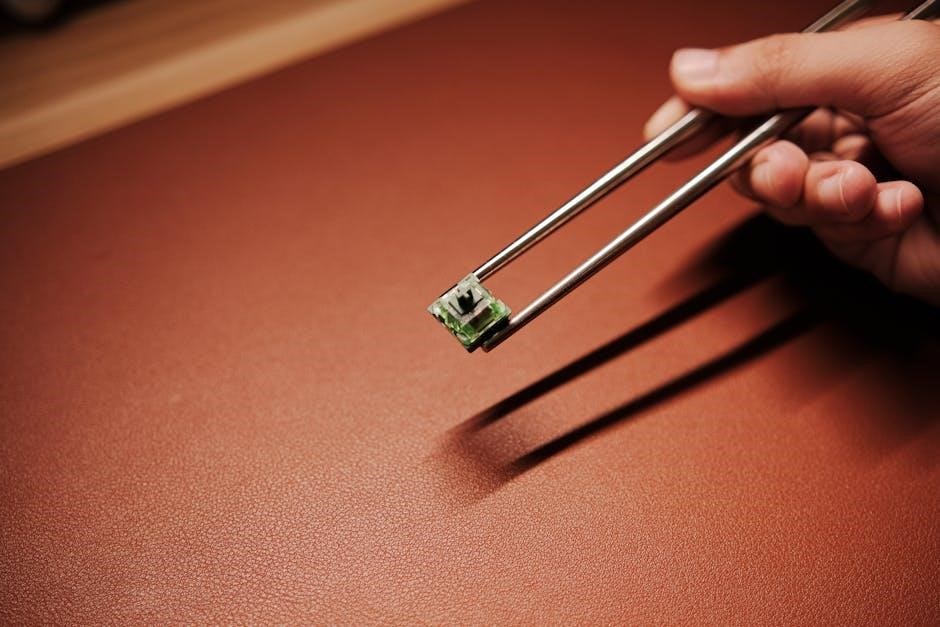
Keycap Issues
Experiencing problems with your RK61’s keycaps? First‚ ensure they are securely attached. Gently try to wiggle each keycap to confirm it’s properly seated on the switch stem. If a keycap is loose or damaged‚ replacement is recommended. Be mindful of compatibility when sourcing replacements‚ as the RK61 uses a specific keycap profile and mounting style.
For stuck keycaps‚ carefully use a keycap puller to avoid damaging the switch. Avoid excessive force. If keys aren’t registering‚ check for debris under the keycap. Regularly cleaning your keyboard can prevent such issues. Consider seeking guidance from online mechanical keyboard communities for specific troubleshooting tips.