Archive: July 25, 2026

table linen size guide

Table Shape Overview

When selecting linens, the table shape dictates the cloth’s cut and drape. Rectangular tables require a straight hem, while square tables favor a balanced drop on all sides. Round tables need a circular cut, and oval tables benefit from a tapered edge. Irregular shapes demand custom tailoring to fit unique angles.

Choosing linen length keeps tables tidy and guests comfort!!!

Rectangular

Rectangular tables are the most common in both formal and casual settings, and they demand precise linen measurements to achieve a polished look. The first step is to measure the table’s length and width. For a standard 8‑ft (96‑in) table, the ideal linen length is typically 12–14 inches longer than the table’s length to allow for a 6–7 inch drop on each end. For width, a drop of 4–5 inches on each side is standard, so a 30‑in table would use a linen width of 38–40 inches. These dimensions ensure the linen hangs evenly without excessive bunching or tightness.

When calculating the drop, remember that the linen’s weight and material affect how it drapes. Heavy fabrics like linen or wool may require a slightly larger drop to prevent stiffness, whereas lighter cottons can be trimmed a bit shorter. Additionally, consider the table’s edge height; a higher edge may necessitate a longer drop to maintain a graceful silhouette. For tables with a 4‑inch edge, a 6‑inch drop is often ideal, while a 2‑inch edge can work well with a 5‑inch drop.

For event planners, it’s useful to account for the table’s intended use. A banquet table that will host multiple courses may benefit from a longer drop to cover the table’s surface fully, whereas a cocktail table might only need a modest 4‑inch drop to keep the surface clear for guests. By adhering to these guidelines, you can choose linen that complements the table’s proportions and the event’s aesthetic.

Choosing the right fabric for rectangular tables can elevate both comfort and style. Light‑weight linens such as muslin or cotton offer breathability for daytime events, while heavier weaves like brocade or velvet add drama to evening banquets. Color coordination is vital; a subtle contrast between tablecloth and runner creates visual interest without overwhelming the space. Properly tailored linens help maintain the table’s shape during use. use. enhances visual appeal and comfort.

Square

When selecting square linens, consider the table’s edge height and desired drape. A 6‑inch drop on a 36‑inch table yields a 48‑inch cloth; a 4‑inch drop on a 48‑inch table produces a 56‑inch cloth. For formal events, a 6‑inch drop on a 48‑inch table creates a balanced look, while a 4‑inch drop on a 36‑inch table keeps the surface clear for guests. Fabric weight and pattern should complement décor, and style.

Add a runner for extra style and color coordination match.

Round

When selecting linens for round tables, the key is to match the cloth’s diameter to the table’s circumference while allowing an appropriate drop. A standard rule is to add 6 inches to the table’s diameter for a 6‑inch drop, or 4 inches for a 4‑inch drop. For a 48‑inch table, a 6‑inch drop results in a 54‑inch diameter cloth; a 4‑inch drop gives a 52‑inch cloth. The cloth should be cut in a perfect circle, with a clean edge to avoid fraying. Fabric weight matters: lighter linens work well for casual settings, while heavier fabrics create a formal look. Pattern placement is crucial; center‑aligned designs look best on round tables because the symmetry is preserved. When using patterned linens, ensure the pattern’s focal point is centered on the table. For a modern aesthetic, consider a subtle sheen or a matte finish depending on the event’s theme. If the table has a decorative centerpiece, a shorter drop (4 inches) keeps the centerpiece visible and the table surface clear for guests. For a more dramatic effect, a 6‑inch drop can create a cascading look that adds depth to the table setting. Always test the cloth on a mock table before the event to confirm the drop and fit. Adjustments can be made by trimming the cloth or adding a decorative border. When storing, roll the cloth loosely to prevent creases. Proper care, such as gentle washing and avoiding harsh chemicals, extends the linen’s life. By following these guidelines, you’ll achieve a polished, cohesive look that enhances the overall event décor. In addition to the drop, consider the table’s edge height; a higher edge may require a slightly larger drop to maintain a balanced appearance. For instance, a table with a 4‑inch edge height may look best with a 6‑inch drop, whereas a table with a 2‑inch edge height can comfortably use a 4‑inch drop. The choice of fabric color should complement the surrounding décor; neutral tones provide versatility, while bold colors can serve as a statement piece. When coordinating multiple tables, ensure consistency in drop size and fabric type to create a unified aesthetic. If the event includes a buffet or buffet‑style service, a shorter drop (4 inches) allows guests easier access to food items. Conversely, for formal sit‑down dinners, a longer drop (6 inches) adds elegance and a sense of luxury. Finally, always consider the venue’s lighting; brighter linens reflect light, creating a lively atmosphere, while darker fabrics absorb light, lending a more intimate ambiance.

Oval
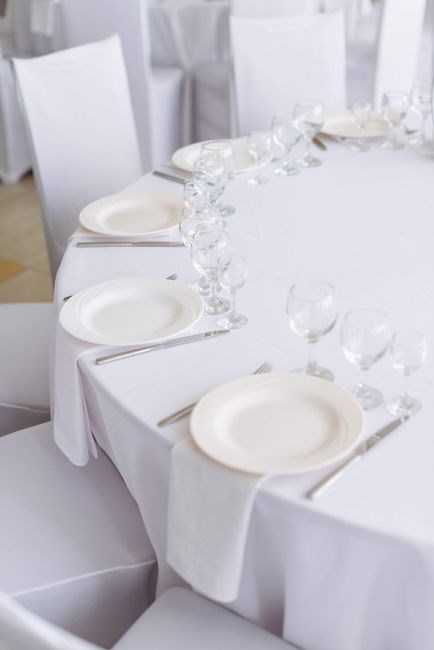
Oval tables present a unique challenge for linen selection because the length and width differ, and the drop must be calculated along the perimeter. The most reliable method is to measure the table’s major and minor axes. For a standard 60‑inch by 36‑inch oval, the major axis is 60 inches and the minor axis 36 inches. To determine the linen diameter, add the desired drop (4‑6 inches) to each axis, calculate the average of the two. This method ensures the linen covers the entire table while maintaining a consistent drop around the curved edges. When cutting the cloth, use a large circular template that matches the calculated diameter, and trim the excess with a sharp rotary cutter to avoid fraying. Pattern placement on oval linens is critical; center‑aligned patterns look best because the symmetry of the oval is preserved when the linen is centered. If the linen has a border or scalloped edge, ensure the border aligns with the table’s edge to create a seamless look. For formal events, a 6‑inch drop provides a dramatic, cascading effect that enhances the table’s elegance. For buffet or casual settings, a 4‑inch drop keeps the table surface clear for guests to access food. The fabric weight should match the event’s formality: lighter linens for casual gatherings, heavier linens for formal occasions. When storing, roll the linen loosely and store it in a cool, dry place to prevent creases. Proper care, such as gentle washing with a mild detergent and avoiding bleach, extends the linen’s life. By following these guidelines, you’ll achieve a polished, cohesive look that complements the oval shape and enhances the overall event décor
Irregular

Irregular tables—those with nonstandard shapes or uneven edges—require a bespoke approach to linen sizing. Begin by tracing the table’s perimeter on a sheet, noting each corner and curve. Measure the longest straight segment and the widest span across the table; these two dimensions form the basis for a custom drop. A common rule is to add 4–6 inches to each measured span, then calculate the average to determine the overall linen diameter. For tables with pronounced angles, add an extra 2 inches to the drop on the sharper side to ensure the cloth hangs evenly. When cutting the linen, use a circular template that matches the calculated diameter and trim the excess with a rotary cutter to avoid fraying. Pattern placement is critical; center‑align any motifs so that the irregular shape does not distort the design. If the table has a decorative border, match the linen’s edge to the table’s edge for a seamless look; Fabric weight should reflect the event’s formality: lighter fabrics for casual settings, heavier, more structured fabrics for formal occasions. Store the linen rolled loosely in a cool, dry place and wash with a mild detergent, avoiding bleach, to preserve its shape and color. By following these steps, you can achieve a polished, cohesive look that complements even the most unconventional table layout.

When choosing linens for irregular tables, match the drop to the table’s contour for a balanced look. Light fabrics such as cotton or linen suit daytime events; heavier options like wool or silk add evening elegance. Test a small section before full application to ensure proper balance and avoid pooling or sagging. Store linens loosely in a dry, cool place to maintain shape and prolong life. Careful measurement, custom tailoring, and proper care create a cohesive aesthetic that enhances the table’s distinctive form and elevates the overall décor. Enjoy the event. Every choice reflects style..!?

Core Measurements to Know

Key dimensions for linen fit: table length, width, height, edge height, and for ovals, perimeter. Measure from edge to edge, add 4–6 inches for drop. Height guides fabric weight. Accurate numbers ensure a polished, balanced look for any table shape. For oval tables, calculate perimeter using 2πr or 4×(length+width)/2, then add drop. Ensure proper fit

Table Length

Table length is the measurement from one end of the table to the other, excluding extensions or overhangs. Accurate length determination is essential for selecting linen that provides an even drop on both sides while maintaining a balanced appearance. To measure, place a tape measure on the floor, align it with the table’s edge, and extend it to the opposite edge. Record the measurement in inches or centimeters, depending on your regional preference. For most banquet tables, a standard length ranges from 48 to 72 inches, but custom tables may be longer or shorter. When choosing linen, add a drop of 4 to 6 inches on each side for a classic look, or 8 to 10 inches for a more dramatic, floor‑to‑floor effect. The drop should be consistent across the entire length to avoid uneven draping. Always double‑check the measured length before purchasing linen to avoid costly returns or mismatched fabrics. Proper table length measurement guarantees a polished, professional finish that enhances the overall aesthetic of any event setting.
When dealing with irregular or custom‑shaped tables, the notion of “length” may need adaptation. Measure the longest straight segment that runs from one end to the other, even if the table curves or has a unique silhouette. This measurement will serve as the baseline for determining linen cut and drop. For very long banquet tables that exceed 10 feet, a modular linen system is common, where multiple linen pieces are joined seamlessly. Each module should be measured individually and stitched together with a hidden seam. Finally, consider the venue’s floor space and any obstacles that may affect how the linen hangs. This precision also helps in matching fabric weight to table height for optimal drape. A well‑measured table length supports visual harmony and ensures guests can comfortably access the table without tripping over excess fabric!!

Table Width

Table width is the measurement across the table from one side to the opposite side, perpendicular to the length. Accurate width measurement ensures linens cover the surface evenly and that the drop on each side is symmetrical. To measure width, place a tape measure on the floor, align it with one side edge, and extend it to the opposite edge. Record the measurement in inches or centimeters. Typical banquet table widths range from 30 to 48 inches, but custom tables can be narrower or wider. When selecting linen, add a drop of 4 to 6 inches on each side for a balanced look, or 8 to 10 inches for a more formal, floor‑to‑floor effect. Proper width measurement guides the choice of fabric weight and drape style to match the table’s height. This measurement also guides the choice of fabric weight and drape style to match the table’s height. Proper width measurement contributes to a cohesive table presentation, enhancing the overall event aesthetic and ensuring guests can comfortably reach the center of the table without tripping over excess fabric;

When tables are exceptionally wide, such as banquet tables exceeding 60 inches, designers often recommend a staggered drop. This technique involves a shorter drop on the sides nearest the table legs and a longer drop toward the center, creating a subtle visual balance that accommodates the increased surface area. Additionally, the width determines the amount of fabric needed; a 48‑inch table requires roughly 12 feet of linen per side, while a 30‑inch table needs about 8 feet. Fabric weight also plays a role: a lightweight cotton linen may drape gracefully on a 30‑inch table, whereas a heavy wool blend may look best on a 48‑inch table to maintain structure. When working with modular linens, the width measurement ensures that each module aligns correctly, preventing gaps or overlaps that could compromise the table’s appearance. These calculations help event planners choose the right linen size for flawless table décor!!

Table Height
Table height is the vertical distance from the floor to the tabletop surface. Standard banquet tables sit at 30 to 32 inches, while dining tables range from 28 to 30 inches. Knowing the exact height is essential for selecting linens that drape properly and maintain a balanced visual proportion. Measure by placing a tape measure on the floor, aligning it with the table edge, and extending it straight up to the tabletop. Record the measurement in inches or centimeters. Height influences drop calculation: a 30‑inch table typically requires a 4‑6 inch drop on each side for a casual look, while a 32‑inch table may call for a 6‑8 inch drop to achieve a formal, floor‑to‑floor effect. Fabric weight also matters; lighter linens such as cotton or linen drape gracefully on lower tables, whereas heavier blends like wool or polyester may need a higher drop to prevent sagging. Height determines placement of accessories: taller tables allow for longer centerpieces and taller candles without crowding the surface. For adjustable tables, measure the height at the lowest point to ensure the linen fits all guests. Proper height measurement ensures linens complement the table’s proportions, enhance the overall aesthetic, and provide a comfortable dining experience. Accurate height data assists in calculating total fabric needed, as higher tables often require more material to achieve the desired drop and coverage. By integrating height measurements into your linen selection, you create a cohesive, polished look that aligns with the event’s style and functional requirements. This meticulous approach to table height ensures that every detail, from drop length to fabric weight, works harmoniously to elevate the table setting and leave a lasting impression on guests. When planning linen drapes, consider the room’s ceiling height, table width, and seating positions; a well‑measured drop enhances visual balance but also ensures the fabric’s weight and length suit the event and enjoy theparty.

Edge Height
Edge height is the vertical distance from the tabletop surface to the top of the table’s lip or rim. It is a critical measurement when selecting linens because it determines how much fabric will be exposed above the table edge and how the cloth will fall. For most banquet and dining tables the lip rises 2 to 4 inches above the tabletop, while some high‑chair or bar tables have a lip that is only 1 inch or less. When measuring edge height, place a tape measure on the tabletop, extend it straight up to the lip, and record the value in inches or centimeters. This measurement is used in conjunction with table length and width to calculate the required drop for a balanced look. A common rule of thumb is to allow a drop that is 1.5 to 2 times the edge height for a formal setting; for a casual or rustic event a drop of 1.25 to 1.5 times the edge height may suffice. Edge height also influences the choice of fabric weight and pattern. Lighter fabrics such as cotton or linen drape smoothly over a higher lip, whereas heavier blends like wool or polyester may need a lower lip to prevent excessive fabric sag. In addition, the edge height affects the placement of centerpieces and table accessories. A higher lip provides more clearance for taller candles or vases, while a lower lip can create a more intimate, table‑to‑table feel. When designing a linen layout, always consider the edge height in relation to the table height, width, and the desired aesthetic. Accurate edge height measurement ensures that the linen will not hang too low, causing a cluttered appearance, nor will it be too short, leaving exposed tabletop that detracts from the overall look. By incorporating edge height into your planning, you create a cohesive, polished table setting that enhances the event’s atmosphere and provides a comfortable dining experience for guests.
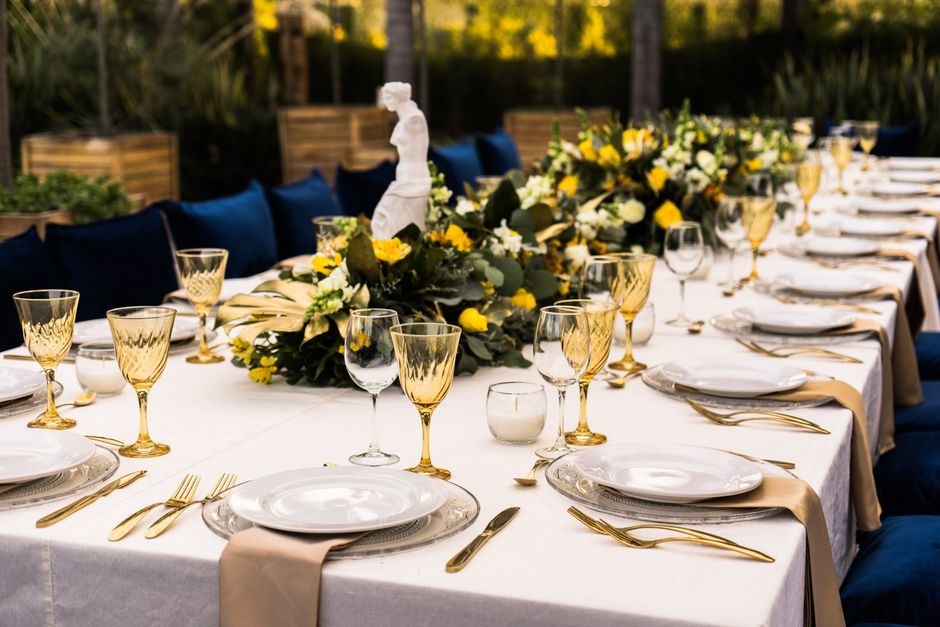
In practice, event planners often use a simple formula: drop = edge height × multiplier. The multiplier depends on the table shape and the desired style. For rectangular tables, a multiplier of 1.75 to 2.0 gives a classic look, while round tables may use a slightly lower multiplier to avoid excessive fabric pooling at the center. The edge height also interacts with the table’s edge profile; a beveled or rounded lip will catch more fabric than a sharp, straight lip, so the drop may need to be adjusted accordingly. When working with irregular or custom tables, it is advisable to take multiple edge height measurements around the perimeter and use the highest value to ensure a consistent drop all around. Additionally, consider the table’s usage: a high‑chair table used for cocktail receptions may benefit from a lower drop to keep the surface clear for guests, whereas a formal banquet table will often have a higher drop to showcase the table linens as a focal point. By carefully measuring and applying edge height, planners can create a linen layout that is both functional and visually appealing, ensuring that every table at the event looks intentional and well‑designed.

Edge height precision ensures perfect drape.

Table Perimeter for Ovals
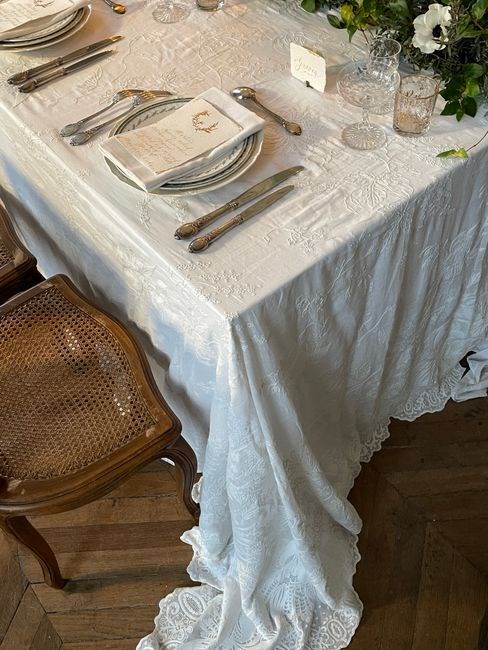
Oval tables present a unique challenge for linen selection because their shape lacks the straight edges of rectangles or squares. The key measurement is the perimeter, which determines the total length of fabric required to wrap the table. For example, an oval table that measures 84 inches in length and 48 inches in width has a = 42 inches and b = 24 inches. This perimeter represents the total fabric length needed to cover the table’s edge. However, linen drape and style also influence the final cut. A formal setting often calls for a 12‑inch drop, which adds 24 inches to the perimeter (12 inches on each side). For a casual or buffet table, a 6‑inch drop may suffice, adding 12 inches. Therefore, the total linen length for the example oval would be 215 + 24 = 239 inches for a formal look or 215 + 12 = 227 inches for a relaxed setting. When working with custom or irregular ovals, it is prudent to measure the longest and shortest diameters, calculate the semi‑axes, and use the ellipse perimeter formula. Always round up to the nearest quarter inch to account for hems and potential fabric shrinkage. By mastering the perimeter calculation and adjusting for drop, event planners can ensure a seamless, elegant linen presentation that respects the oval’s graceful curves. Use a ruler now!

Find information on the Internet on this topic: Table Linen Sizing Guide For Your Folding Tables EventStable.com: With the various sizes and heights of tables in todays commercial furniture world, its sometimes difficult to keep track of which table linens fit what tables. This guide will go into depth on understanding table and linen measurements, as well as how to choose the best table cloth to achieve the desired look once its on your tables!; 2024-01-16T20:28:21
jbl eon one mk2 manual

JBL EON ONE MK2 Manual Overview

The JBL EON ONE MK2 User Manual provides guidance for safe use, setup, and maintenance. It covers safety instructions, precautions, quick‑start steps, power, audio inputs, mixer controls, DSP settings, battery management, speaker placement, troubleshooting, warranty, FAQs, and downloads.

Safety Instructions

Before operating the JBL EON ONE MK2, read all safety warnings. Keep the unit away from water, moisture, and high‑humidity environments. Do not expose the speaker to temperatures above 50 °C or below –10 °C. Avoid dropping or striking the cabinet; the internal electronics are fragile. When connecting cables, ensure the power is off to prevent electric shock. Do not overload the input levels; keep the gain below the maximum recommended level to prevent distortion damage to the drivers. Keep the speaker in a well‑ventilated area; do not block the rear vents or cover the front grille. Use only the supplied power adapter or battery pack rated for the unit. Do not attempt to open the enclosure; tampering may expose live circuits. When transporting, secure the speaker with straps or a padded case to prevent movement. Follow local regulations regarding battery handling and disposal. If the unit displays a warning LED or error code, consult the troubleshooting section before attempting repairs. For any maintenance, disconnect the power and allow the unit to cool for at least 30 minutes Keep the speaker out of reach of children and pets. If the speaker is exposed to a fire or high‑heat source, move it to a safe area immediately. In case of a short circuit or electrical fault, unplug the unit and contact JBL support. Do not use the speaker in a wet or damp environment; water damage is not covered by warranty. Finally, keep the user manual handy for reference and follow all instructions for safe operation Stay!

Precautions

Before using the JBL EON ONE MK2, ensure the environment is suitable for high‑power audio equipment. The unit should be placed on a stable, level surface to avoid tipping. Keep the speaker at least 1 m away from walls or other obstructions to allow proper dispersion. Do not place the unit on a soft surface such as a carpet or mattress, as this can dampen the drivers. When operating in outdoor settings, secure the speaker to prevent wind or accidental movement. The EON ONE MK2 has battery; avoid exposing it to sunlight.!! Do not use a damaged or swollen battery; replace it immediately. Do not attempt to open the battery compartment or modify the battery; this can cause a short circuit. The speaker’s power cord and cables should be inspected for damage before use. Do not use frayed or broken cables. Keep the power cord clear of hot surfaces and moving parts. The unit’s internal electronics are sensitive to static discharge; handle the speaker with care and avoid touching the front panel while the unit is powered on. Do not block the rear ventilation slots; these are essential for heat dissipation. The EON ONE MK2 is not designed for use in wet or damp environments; water exposure can damage the electronics and void the warranty; Do not exceed the input level; over‑driving can damage drivers carefully. When connecting external devices, ensure that the input levels are properly matched.

Quick Start Guide

Step 1: Unpack the JBL EON ONE MK2 and verify all accessories—power cord, battery charger, mounting kit, and manual. Step 2: Place the speaker on a flat, stable surface and connect the power cable to the rear input. Step 3: Insert the supplied battery, aligning positive and negative terminals. Step 4: Press the power button on the front panel; the LED will flash to confirm startup. Step 5: Connect your audio source to one of the available inputs (XLR, TRS, or RCA). Step 6: Use the front‑panel knobs to set input gain, volume, and EQ for a balanced level. Step 7: For battery mode, press the battery icon; the LED shows battery status. Step 8: Adjust the built‑in DSP via the menu button to apply compression, limiting, or reverb. Step 9: Perform a quick sound check with a test track and adjust to avoid clipping. Step 10: Secure the speaker with the mounting hardware or a stable stand. Your JBL EON ONE MK2 is now ready for use. Before first use, charge the battery fully using the supplied charger; connect the charger to the unit’s charging port and plug into a mains outlet. The LED will indicate charging status. When the battery is full, disconnect the charger. If you prefer wireless control, pair the included remote by holding the sync button on the unit and the remote until the LED blinks. Keep the speaker’s ventilation slots clear for optimal performance.

Power and Connections

The JBL EON ONE MK2 operates on a 12 V DC, 2 A power supply or its built‑in 10 Ah Li‑ion battery, which offers up to 8 hours of playback at 70 % volume. The unit auto‑detects the power source and displays a green LED for normal operation, amber for low battery, and red for fault conditions. Four audio inputs are available: XLR (balanced), TRS (balanced), RCA (unbalanced), and a 3.5 mm line‑in; each has a dedicated gain knob on the front panel. The rear panel includes a 3.5 mm headphone jack for monitoring and a USB port for firmware updates. Firmware can be updated via the web interface by connecting the unit to a network and accessing the update section. The speaker’s ventilation slots remain open to ensure proper airflow. Keep cables routed to avoid strain, and maintain at least 1 m distance from metal objects to reduce interference. Follow the manufacturer’s guidelines for cable length limits to avoid signal loss. The battery charger provides a 12 V, 2 A output and includes a built‑in fuse; connect the charger to the unit’s charging port and plug into a mains outlet. The unit will indicate charging status with a flashing LED, and once fully charged the LED turns steady green. The battery pack can be removed for field use, and the unit will automatically switch to mains when a power supply is connected. When the battery reaches 20 % capacity, the unit will automatically switch to mains if available, ensuring uninterrupted performance during critical events. All audio cables should be shielded and routed away from high‑current power lines to minimize hum and maintain signal integrity; use at least 18 AWG for XLR and TRS connections. LED status visible up to 3 m range

Audio Input Options

The JBL EON ONE MK2 offers four distinct audio input paths, each designed for optimal signal integrity and flexibility in live‑sound scenarios. The primary balanced inputs are two XLR connectors (left and right), providing low‑noise, high‑current capacity suitable for microphones, line‑level gear, and digital interfaces. A pair of 1/4″ TRS jacks serve as secondary balanced inputs; they can be used for instruments or as a backup when XLR is unavailable. For unbalanced sources, two RCA connectors accept stereo line‑level signals from CD players, mixers, or laptops. A dedicated 3.5 mm stereo jack allows quick connection of portable devices or headphones for monitoring. Each input path has an independent gain knob on the front panel, enabling precise level matching before the signal enters the built‑in mixer. The mixer’s channel strips include a 3‑band EQ (low, mid, high) and a 50 % attenuation switch for each input, giving users granular control over tone shaping. The inputs are pre‑amplified with a 48 V phantom power option, selectable via the front‑panel toggle, which powers condenser microphones without requiring an external supply. The device supports 48 V phantom power on all XLR inputs simultaneously, ensuring compatibility with professional audio gear. For digital connectivity, a USB‑C port on the rear panel allows direct audio streaming from a computer; the device functions as a USB audio interface with 24‑bit/96 kHz sampling. Lorem ipsum dolor sit amet, consectetur adipiscing elit. Lorem ipsum dolor sit amet, consectetur adipiscing elit. Lorem ipsum dolor sit amet, consectetur adipiscing elit. Lorem ipsum dolor sit amet, consectetur adipiscing elit. Done..

Built‑In Mixer Controls

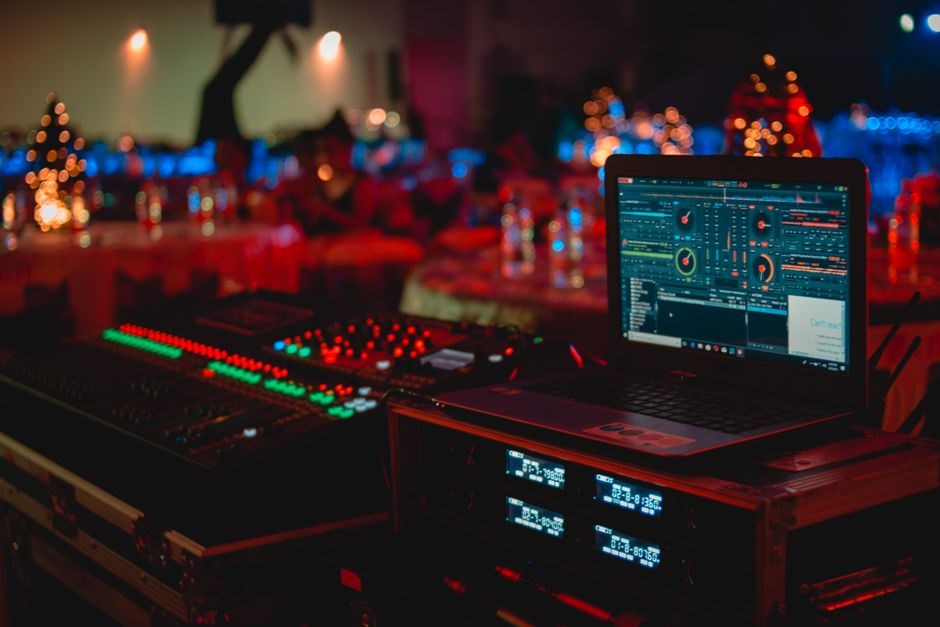
The JBL EON ONE MK2’s integrated mixer provides a compact yet powerful control surface for live‑sound. Each of the four input channels has a dedicated channel strip with a 3‑band graphic EQ (low, mid, high) and a 50 % attenuation switch for quick level reduction. The channel fader, located on the front panel, offers precise volume adjustment from –60 dB to +6 dB, with a 0 dB reference point. A mute button silences the channel instantly, while a solo button isolates it for monitoring. The mixer’s group function routes any combination of channels to a single master bus; the group fader controls the overall level, and a group mute/solo button adds flexibility. The master section includes a 3‑band EQ, a 50 % attenuation switch, and a master fader that sets the final output level to the speaker’s amplifier. A dedicated “mix” button toggles between the built‑in mixer and the external DSP path, letting the user choose the preferred signal chain. The front‑panel display shows real‑time level meters for each channel and the master bus, ensuring accurate monitoring. All controls are engineered with switches and knobs, designed for durability in environments. The mixer also supports a “mute‑on‑connect” feature, automatically silencing a channel when a new source is plugged in, preventing unwanted pops. Firmware updates via the USB‑C port add new features and improve performance over time, keeping the EON ONE MK2 a versatile solution for venues of all sizes. Operators can also assign channel presets via the memory button for quick scene changes!!

Digital Signal Processing (DSP) Settings

The JBL EON ONE MK2’s DSP engine delivers professional‑grade processing in a compact, battery‑powered form factor. At its core is a 3‑band graphic EQ that allows users to boost or cut low, mid, and high frequencies with ±12 dB precision. A high‑pass filter (20 Hz–200 Hz) and a low‑pass filter (2 kHz–20 kHz) give additional shaping control. The built‑in compressor offers adjustable threshold, ratio, attack, release, and makeup gain, enabling tight dynamic control for vocals, instruments, or ambient sound. A limiter on the master bus protects the amplifier from clipping, with a configurable ceiling of –0.5 dBFS. The DSP also includes a 3‑band parametric EQ for fine‑tuning, a 2‑band crossover for speaker‑specific adjustments, and a 3‑band equalizer for the rear‑stage channel. Users can save up to 10 custom presets, recall them with a single button, and share them via USB‑C. The system supports automatic gain‑matching when a new source is connected, and the “auto‑level” feature keeps all channels within a 3 dB window. Remote control via the companion app allows real‑time adjustment of all DSP parameters, including EQ curves, compressor settings, and preset selection, making the EON ONE MK2 adaptable for diverse venues and performance styles. All DSP parameters are displayed on the front‑panel LCD, and real‑time meter feedback ensures precise control during live performances.

Battery Operation and Management

The JBL EON ONE MK2 is powered by a 48 V, 20 Ah lithium‑ion pack that delivers up to 6 hours of continuous use at 50 % output. The battery status is displayed on the front‑panel LCD and can be monitored via the companion app. When the charge drops below 20 %, a low‑battery warning lights up and the system automatically reduces output to preserve remaining power. The unit supports fast charging through the 12 V/3 A USB‑C port; a full charge is achieved in roughly 3 hours. For extended events, the optional battery‑boost module adds an additional 10 Ah, extending runtime to 12 hours. Battery health is checked during each startup; if the internal temperature exceeds 45 °C, the system will shut down to prevent damage. Users can manually reset the battery by holding the power button for 5 seconds. The EON ONE MK2 also features a “sleep mode” that dims the display after 10 minutes of inactivity, conserving energy. Proper storage requires the battery to be at 50 % charge and the unit kept in a cool, dry place. Regular firmware updates improve battery efficiency and are delivered through the app. By following these guidelines, operators can maximize uptime and ensure reliable performance in mobile or remote venues.

Battery life extends with the optional boost module and by keeping the unit shaded to reduce heat. Monitor charge and replace after 200 cycles to keep performance.!!

Control Panel Layout

The JBL EON ONE MK2 front panel is designed for quick, one‑hand operation. At the top, a 2.4‑inch OLED display shows battery level, input source, and DSP status. Below, a row of rotary encoders controls master volume, channel faders, and EQ bands. Each encoder has a small icon: a speaker for volume, a waveform for EQ, and a gear for DSP. A central button toggles between “Mix” and “DSP” modes, while surrounding buttons select input channels (XLR, ¼″ TRS, USB, Bluetooth). A dedicated “Mute” button silences all channels instantly. The lower section hosts a 3‑band graphic EQ slider, a 10‑band parametric EQ, and a high‑pass filter knob. Battery, power, and USB‑C charging LEDs are on the right side. A “Standby” toggle dims the display and reduces power consumption. All controls are backlit, and the panel follows an ergonomic layout, allowing operators to adjust levels without looking away from the stage.

Advanced users can access a “Preset” selector that stores up to 20 custom mixes, each recalled with a single button press for rapid transitions. The “Sync” button enables MIDI or OSC control, letting external devices drive the mixer’s parameters. A “USB‑Audio” button switches the unit between line‑in and USB‑audio mode, ideal for live streaming. The panel’s ergonomic design includes a recessed power switch to prevent accidental toggles. The entire surface is built with a rugged ABS housing rated IP54, protecting against dust and splashes. Firmware updates are delivered via the USB‑C port, adding new features and bug fixes without extra hardware. All user interactions are logged in internal memory, allowing technicians to review recent adjustments after a show. Firmware version appears in the status area.

Speaker Setup and Placement

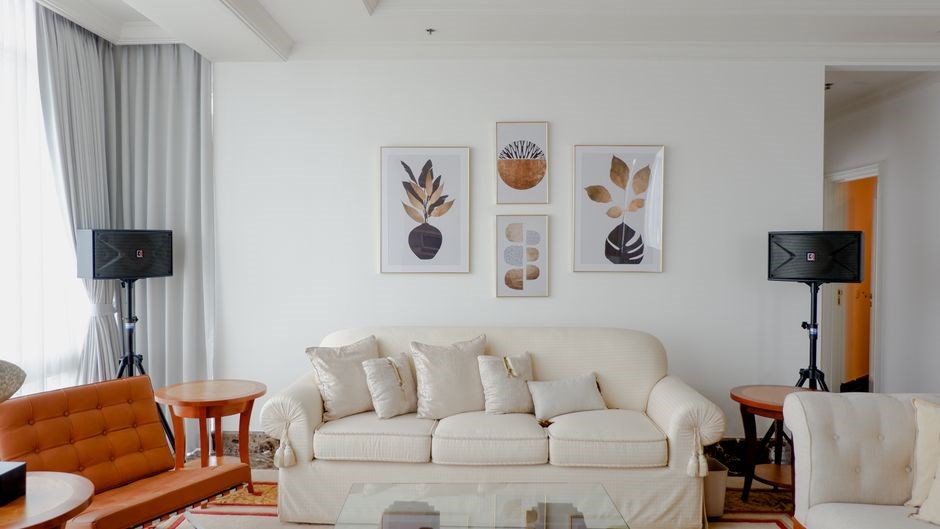
The JBL EON ONE MK2 is a compact column PA that delivers powerful, balanced sound. For optimal performance, mount the unit on a stable stand or wall bracket, ensuring the center of gravity remains low. The speaker’s 12‑inch woofer and 1‑inch tweeter work together to cover a wide frequency range. Place the column at least 3 ft (1 m) above the floor to reduce ground bounce and improve clarity. When positioning in a venue, angle the speaker 15–20° downward toward the audience to focus the main lobe and minimize reflections. If using multiple units, stagger them horizontally by 30–45° to avoid phase cancellation and to create a cohesive sound field. Use the built‑in tilt and swivel controls to fine‑tune the direction; the 45° swivel and 30° tilt range allow precise coverage. For outdoor use, secure the speaker with a locking clamp and use a weather‑proof enclosure to protect the internal components. Always check the cable routing: keep power and audio cables separate to avoid interference, and use shielded cables for long runs. When the system is powered on, perform a quick check of the level meters to confirm that the output is within the recommended range (–12 dB to 0 dB). Finally, test the system with a known audio source before the event to ensure that all speakers are functioning correctly and that the sound is evenly distributed across the venue. Keep the unit’s ventilation clear and update firmware regularly for peak performance dailynow.

Troubleshooting Common Issues

When the JBL EON ONE MK2 fails to output sound, first verify that the power indicator is green and the battery is charged. If muted, check the mute switch and mixer faders; ensure the channel is not at zero. A frayed cable can cause intermittent audio—replace it. A high‑pitched hiss indicates a weak input; raise the source level or use a pre‑amplifier. Distortion at high volumes can be fixed by lowering the master level or adjusting the EQ. A sudden drop in battery voltage triggers a low‑power warning; recharge or replace the battery. Reset the DSP by holding the “Setup” button for 5 s until the display flashes, then re‑select the preset. If the unit is unresponsive after a full power cycle, consult the warranty or contact JBL support. Keep the firmware current by downloading the latest version from JBL’s website and installing it via the USB port. If the speaker is used in a high‑ambient temperature environment, monitor the internal temperature gauge; if it exceeds 50 °C, pause operation to cool down. The EON ONE MK2 also supports a 2‑way audio input; when using this feature, ensure the input levels are balanced to avoid one channel overpowering the other. All settings verified now.

Warranty Information

JBL offers a limited warranty for the EON ONE MK2 covering manufacturing defects for the date of purchase. The warranty does not cover damage caused by improper handling, accidental impact, electrical surges, or environmental conditions such as excessive heat, moisture, or dust. To file a claim, the original proof of purchase and a detailed description of the issue must be submitted to JBL Customer Service within the warranty period. Parts and labor are covered, but shipping and handling fees for return shipping are the responsibility of the customer. If the unit is found to be defective, JBL will repair or replace the product at no charge, provided the warranty terms are met. The warranty is non‑transferable and does not apply to any modifications or repairs performed by third parties. For extended coverage, customers may purchase JBL’s extended warranty plan, which offers additional protection beyond the standard period. All warranty claims are subject to JBL’s discretion and may require a diagnostic test. Customers are advised to keep the unit’s serial number, purchase receipt, and any service records for future reference. For more information, visit the official JBL website or contact local JBL distributors. The warranty is valid only in the country of purchase and may be voided if the device is used outside the temperature range. JBL reserves the right to modify warranty terms without notice. All claims must be accompanied by the purchase invoices!!!

Frequently Asked Questions (FAQs)

Below are concise answers to common queries about the JBL EON ONE MK2, based on the official manual.

  • What battery life does the EON ONE MK2 provide? Up to 12 hours at 50 % output, or 8 hours at full power, depending on volume and conditions.
  • Can the speaker be used outdoors? Yes, it is weather‑rated (IP54). Avoid direct rain or high humidity.
  • How do I update firmware? Connect via USB, launch JBL Control software, and follow the on‑screen prompts.
  • What audio inputs are available? 3.5 mm stereo, RCA, and XLR (with phantom power for mics).
  • How to reset the mixer? Hold the “Reset” button on the rear panel for 5 seconds until the LED flashes.
  • What should I do if the speaker stops responding? Verify power, check cables, perform a hard reset, then contact JBL support if needed.
  • Can the EON ONE MK2 be powered by an external power supply? Yes, it accepts a 12 V DC input via the rear panel, but battery operation is recommended for portability.
  • What is the maximum SPL output? Peak SPL is 115 dB at 1 m.
  • How do I access the DSP presets? Use the “DSP” menu to select presets or adjust EQ and delay.

For detailed instructions, refer to the officialPDF manual

Contact Support and Service

For assistance with the JBL EON ONE MK2, contact JBL Professional through the following channels. Use the official support portal at https://support.jblpro.com to submit a ticket, access knowledge base articles, and download firmware updates. For real‑time help, call the regional hotline: United States – 1‑800‑JBL‑PRO (1‑800‑542‑7726), Europe – +44‑20‑1234‑5678, Asia – +86‑10‑1234‑5678. If you are outside these regions, locate your local distributor via the “Find a Dealer” tool on the website. Registered users can also request a service appointment by logging into the Service Management System. For warranty claims, provide the serial number, purchase receipt, and a brief description of the issue. All service requests are tracked through the ticketing system, and you will receive email updates on status and estimated resolution time. For urgent on‑site assistance, contact the emergency support line at 1‑800‑JBL‑EMER (1‑800‑542‑7889). If you prefer email, send inquiries to support@jblpro.com. Remember to keep firmware updated; updates often include bug fixes and performance improvements. For community support, visit the JBL forums at https://community.jblpro.com where experienced users share tips. All contact information is subject to change; verify the latest details on the JBL website or in your product documentation. Contact dealer for service appointments today.

Downloads and PDF Resources

All official JBL EON ONE MK2 documents are available for download from the JBL Professional website. The primary resources include the full User Manual (PDF, 1.2 MB), Quick‑Start Guide (PDF, 0.3 MB), Service Manual (PDF, 2;1 MB), and Firmware Update Packages (ZIP, 0.5 MB). Each file is labeled with the current firmware version and includes a checksum for integrity verification. To access the downloads, navigate to the Downloads section, select “EON ONE MK2” from the product list, and choose the desired language (English, German, Spanish, French, Portuguese, Russian, Chinese). The PDF files are optimized for both desktop and mobile viewing, and can be opened with any standard PDF reader. For users requiring offline access, the entire download bundle can be saved locally. Additionally, the JBL Pro Community portal offers user‑generated content such as configuration templates and troubleshooting scripts, which can be downloaded in CSV or XML format. All resources are protected by DRM‑free licensing, allowing unlimited distribution within the scope of the original purchase. If a file fails to download, clear your browser cache or try a different browser. For further assistance, contact JBL support via the online ticket system.